Scotch Yoke Demonstration
Apr. 2020

Project Description
For my Elements of Electrical Engineering class, I had to document my own invention using our class Arduino starter kit. I decided to combine two of our class builds to create a scotch yoke demonstration, inspired by a YouTube video titled "Scotch Yoke Mechanism Model" by Ludic Science. I also had to write a description of how my invention works and create a detailed parts list, a wiring schematic, and flowchart, some of which I've provided below.
Detailed Description
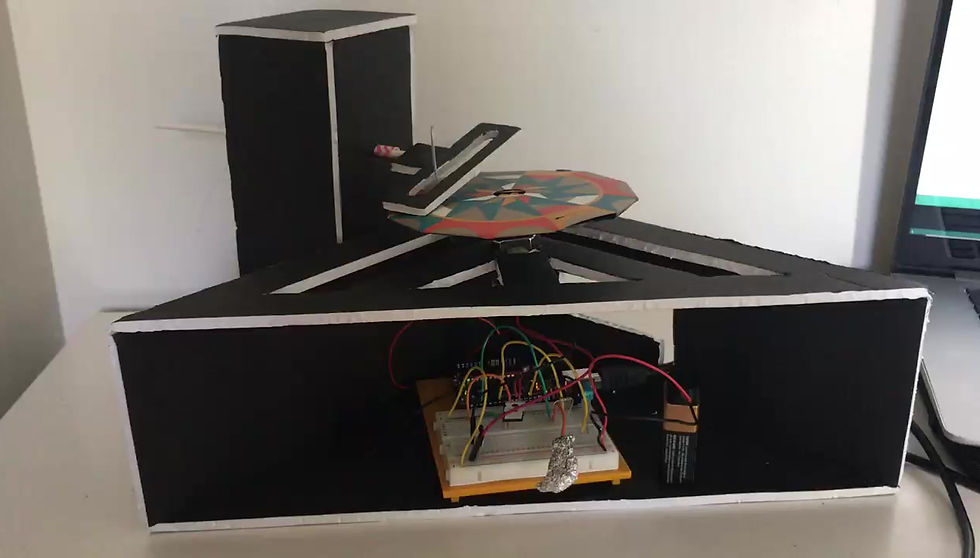
This project integrates Build 9 and 13 from the Arduino Project Book with additional help from my father in designing and creating the housing and pillar out of poster board. Similar to Build 13, I designated pin 6 to send electrical energy and pin 2 to receive it. I also set up a serial monitor running in the background to read sensor values. If a certain threshold is reached, which I lowered from 1000 to 500, then the DC motor, attached to a small plastic hub, will spin a CD located at the top of the housing, and a blue LED will turn on. At first, the motor and blue LED remain off because the sensor value is below the threshold value. When the foil is touched, the user will absorb some of the charge, which means the two pins will take longer to be the same. The threshold is typically reached via this disruption, and this activates the DC motor, placed through the roof of the housing, causing it to spin (Build 9).
A MOSFET is placed on the breadboard to control high current and high voltage power sources from the low output Arduino while a diode prevents back voltage. When the motor is activated, a blue LED turns on and the CD wheel at the very top begins to spin. Between the CD and the decorative paper is a paper clip, punched through the paper to act as the sliding pin. Placed on top of the paper clip is a sliding yoke with a connecting rod, made from poster board and a lollipop stick, which transforms the initial rotational motion into a linear one through the straw placed within the pillar. When the user lets go of the foil, the sensor value drops below the threshold, the LED turns off, and the motor stops spinning. This circuit is powered via a 9-Volt battery and a USB cable attached to the computer.


Process
There are many ways to approach a scotch yoke demonstration, and I researched many different designs and went through many iterations in my head before creating a prototype. Once I decided and created the prototype I wanted, I realized there were structural errors and it did not look aesthetically pleasing. I thought for a while longer and flipped my original design on its side and created what is shown below. This is what inspired my father and I to design the final demonstration out of poster board.

Overall Experience & Skills Attained
I was able to further expand my critical thinking skills as I brainstormed different designs and made modifications to the initial idea I had. One's first idea is usually never the best, so an initial design will most likely go through several modifications before reaching the final product. I understood this a bit more and adjusted to the problems and changes I had to confront while creating this.
I also gained further experience with using an Arduino and understanding Arduino code as I had to make proper modifications to pre-existing code to create this demonstration.